Take Better Photos in the Dark: Night Mode tips for iPhone, Samsung Galaxy and More

Andrew Hoyle/CNET
Today’s best phones, including the iPhone 13 Pro, Samsung Galaxy S22 Ultra and Google Pixel 6 Pro, have night photography modes that allow them to take bright and sharp photos even in the middle of the night. This kind of night mode photography used to be something you’d need a DSLR on a tripod with long exposures to do, but even some of today’s more affordable phones are able to take great-looking images after the sun has set.?
And that’s great, as it means you don’t need to carry a heavy camera and tripod into town every time you want to get a good-looking shot after sundown. In fact, you don’t need any extra equipment at all.
But getting an image you like so much you want to print it up and put it on your wall isn’t just a case of waiting for darkness and whipping out your phone. You’ll still need to put in some work to take shots that’ll rack up those Instagram likes.?
Here are my top tips on how to get great images at night on your phone.?
1. Know how to activate night mode
If your phone has a night mode, it’s important to make sure it’s actually activated before you start shooting. On phones like the iPhone 13 series, night mode will automatically kick in when the phone detects that you’re in a low-light situation. On some Android phones you may find a specific shooting mode that you’ll need to use to capture the best low-light images.
Different phones may have different options so if you’re unsure how to use yours — or if your phone even has one — then a quick Google search of the model and “night mode” should answer your questions.

This nighttime photo has been made all the more vibrant and dazzling by these incredible Christmas lights festooning the columns.
Andrew Hoyle/CNET2. Look for the light
While phones like the new iPhones and recent Galaxy phones can take amazing low-light images, you still need to have some light in the shot in order to make a compelling image. So heading into the darkest part of a forest isn’t likely to result in good results. Instead, try heading into populated areas like city centers (taking all necessary precautions against COVID-19) as you’ll find light sources in the form of street lamps, shop window displays and maybe even some festive lighting during the holidays.
3. Wait for your moment
Great city and street photography often might include a person as a subject in your shot and nighttime can be an awesome time to take those shots. When the light is limited however, you need to make sure that person is exactly where you want them to be and that can involve some patience.
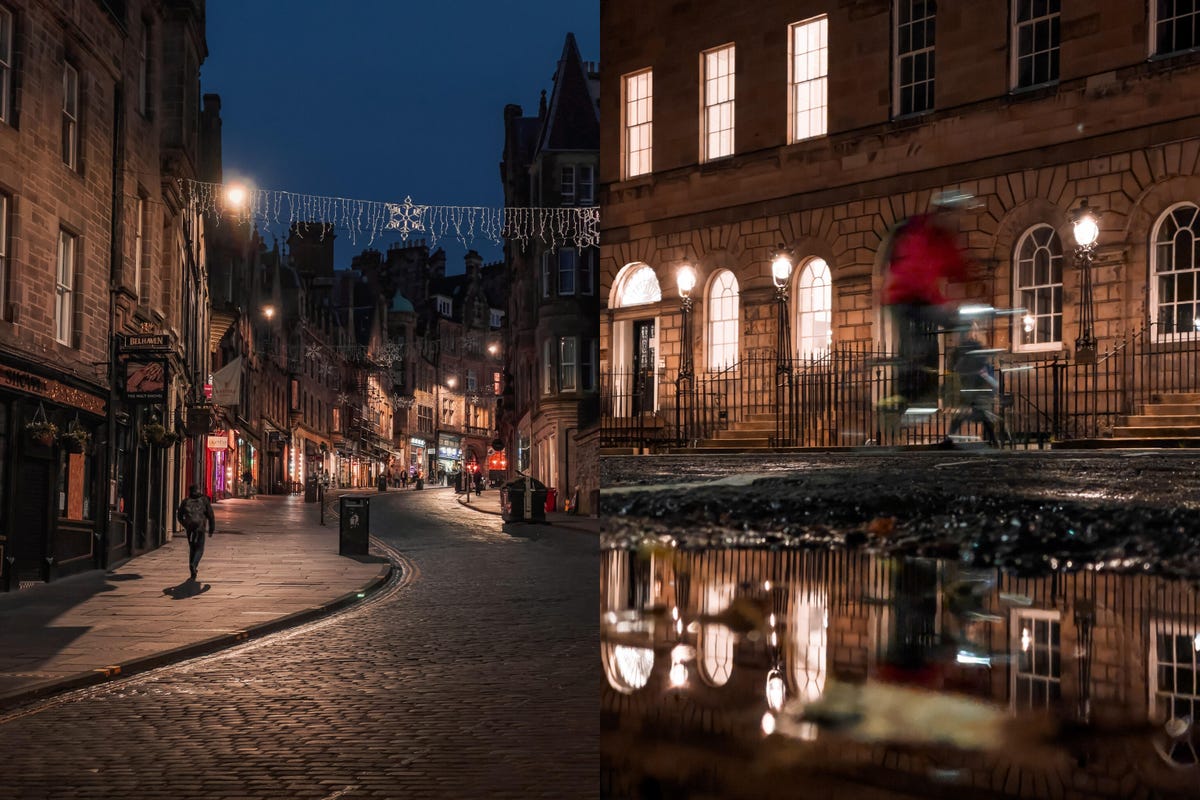
I’m really pleased with both these night-mode images and both of them rely heavily on timing — on the left it was about getting that lone figure walking in the main pool of light on the ground. On the right it was about capturing the cycling speeding past.
Andrew Hoyle/CNET
For example, imagine you’re taking a shot on a road lit by street lamps. Each lamp casts a pool of light, and as someone walks through it, they’ll be temporarily lit up before becoming effectively invisible again in the darkness. In that instance, my advice is to have your shot ready, with your finger hovering over that shutter button. It may take some minutes, but eventually someone might walk exactly through that pool of light and you can take your shot. Patience in this way can really pay off.
4. Steady yourself
Even though night modes on phones don’t require a tripod in the same way a long exposure on a DSLR would, you’ll still get your best results if you keep the phone as still as possible while taking your image. If you don’t have a tripod with you then look around for a low wall, a trash can or anything you can steady your phone on while you get your shot.?
If there’s nothing nearby, you can help steady the phone by holding it firmly in both hands, holding it fairly close to your chest and tucking your elbows in towards your stomach. This will help reduce some of the natural wobble in your hands and may make the difference in getting a sharper image.
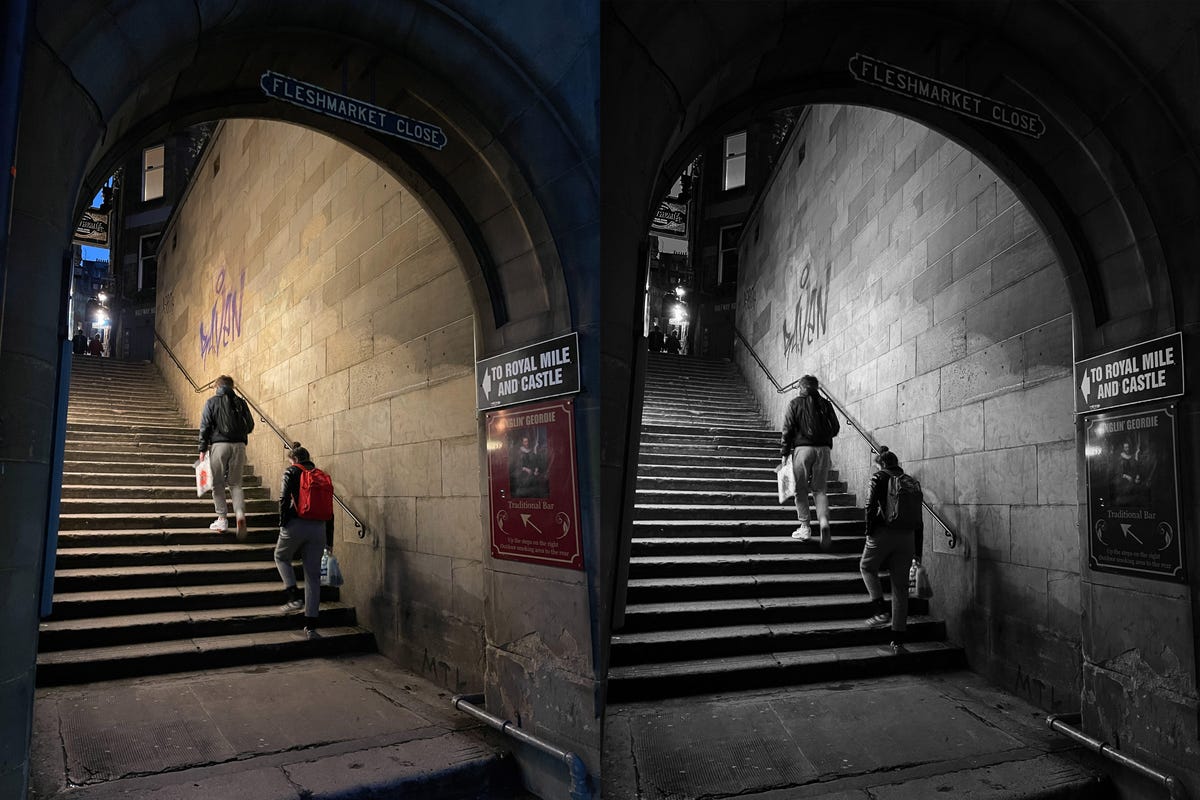
I love a black and white edit of nighttime photos. I think the natural contrast of bright street lights in the shadowy backgrounds translates so well to a monochrome image.
Andrew Hoyle/CNET5. Edit your shots
As with any good photo, taking the shot is only half the story; it’s how you edit it that can be the biggest way to transform it into a real piece of art. I use Adobe Lightroom Mobile for most of my editing but Google’s Snapseed is really powerful as well and is totally free on iOS and Android.
By their nature, night photos may well be dark, so it’s possible you might want to start by lifting the exposure. Be careful though; low-light images, even good night mode shots, will have image noise (a fuzzy grain) that will get worse and worse the more you brighten the image. You may need to reduce some of the highlights (especially if you’ve captured bright street lights) and boost the shadows a touch to balance things out. Pay attention to the details and make sure you’re not pushing it too far.?
From then on, it’s entirely down to what you feel looks good, so spend some time playing around with the tools available and see what you can come up with. I personally find that nighttime scenes can often look great as black and white images, as the natural contrast of bright lights and dark backgrounds lends itself well to a monochrome conversion.